This blog is supported by affiliate ads. When you click on an ad and purchase a product, I get a small commission on the sale. This does not increase the price of the product for you at all. You are not obligated to purchase from ads to read on this blog. Thank you for your support.

Garden Diary: Christmas Day, 2015

LEAVES! LEAVES! AND MORE LEAVES! 
My Solstice gift from Mother Earth is a bounty of leaves for whatever I may choose to use them. I've been raking and piling this morning. I wish I had a wagon so I could haul more from all over the complex, but I believe this huge Chinquapin oak is going to give me all that I can use this year.
The maintenance men are raking them off the roofs in huge piles, but I have no way to haul them way over here from the other end of the complex. Next year, I'm definitely buying a wagon for when the oak leaves fall but for now, I'll have to be happy with what I can get around the apartment, which is no small bounty. I had a large elm tree next door drop half its leaves on my side of the fence, and the Chiquapin has barely started dropping its leaves. If I don't act fast, the yard crew will come mow and blow them away, so I have to get them whole. It would be nice if I could just get them to chop the leaves up and leave them.

Soon-to-be Compost Pile
I started a small leaf pile outside my neighbor's fence. He's into gardening too, so he doesn't mind. I'm planning on getting some pallets and making that into a compost pile next year.

 I added 3 more feet to the outside garden by covering it with leaves to kill the grass. I have to go find some fallen limbs over by the pond to line the walkways to keep the leaves in so they can be dug in next spring. I'll eventually get some more concrete edgers to go all along that side, but 
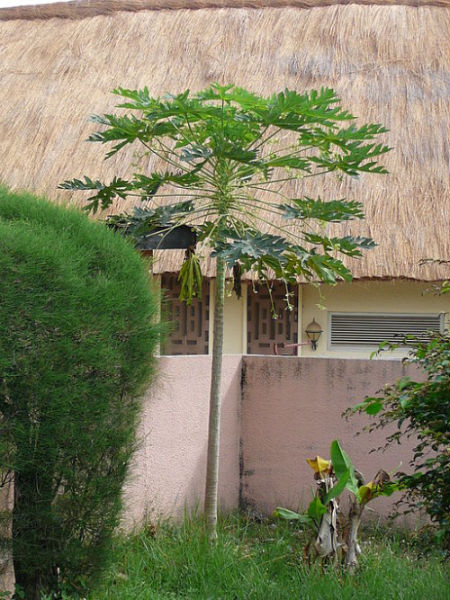
the fallen limbs are working well for now. By the way, that tall plant on the right of the picture is my pigeon pea. I had to stake it, but it's really growing well, and I hope it blooms soon and I get some peas this year.
3 Added Feet to Outside Bed
Soon-to-be Brugmansia Bed

Added more leaves to what will soon be the Brugmansia bed. I'm really looking forward to having those! This is the perfect place for them, with some morning sun and shaded from about 10 a.m. on.
 Will go haul some moss in a bit. It's lighter and easier to carry and is an excellent mulch. I pile it up then cover it with the large (free) pine bark for looks on the outside. I hope they order more of the pine bark because the pile is gettting pretty small. I'm hauling as much as I can now before it's all gone.
And then there is that huge bare area over by the oak tree, where I'm planning on putting a Loquat and probably a Chicasaw plum as well. That's a project for the future, though. I don't want to do too much and create a monster I can't take care of. 

Anyway, I have a plan that includes planting as many edible ornamentals as possible, or at least things that the neighbors won't recognize as food and steal. The rest will go inside the courtyard or as much as I can.

I hope everyone has a very Happy New Year! Let me know what your garden plans are for 2016 in the comments, or in reply to this post on our Simply Deb Facebook page

Garden Diary 10/11/2015: Garden Surprises


One of my favorite things are mystery and surprise plants. I thought I had planted grape tomato seeds from the store, but the fruit on the bush is a cherry tomato. I can't remember if I actually planted any cherry tomatoes or not, but I don't think so. They're small, round and one is starting to ripen, so we'll see what it turns out to be. 

Review: Burpee Long Purple Organic Eggplant

First Eggplant from the Bush. None Got Much Larger than This


Well, I'm giving up on my eggplant finally. For background, I wanted to grow Asian eggplant, which I hadn't grown in many years. I had previously grown Ichiban, but it seems Monsanto bought that and took it off the market because it wasn't viable for commercial growing. I hate Monsanto -- but I digress. I planted late this year, so I just went to WalMart and bought Burpee Long Purple Organic eggplant seeds.

RIP Orchid Cactus


Once upon a time, I lived in a beautiful place called SW Florida. At one time, I worked at a garden center, where I was able to get snips and bits of this and that. My yard was full of beautiful plants. One of my proudest achievements was growing an epiphyllum from a tiny piece of leaf that had broken off and fallen on the ground in the garden center greenhouse.

New Place to Live and Garden Woes


So here I am in my third abode in 18 months, and I do not feel much like The Consummate Gardener right now.

My new place has a nice 11' x 14' courtyard, which already had a few plants in it. I put down cardboard to kill most of the weeds as I unpacked, but I have reached a standstill with unpacking, so some areas still have weeds and I have no money to build the raised beds I want right now.

To make it even worse, some of my favorite plants are dying. My Thanksgiving cactus (pictured above) has died completely, just rotted away. My beautiful staghorn fern that I babied back to life this summer got badly sunburned, so it's indoors trying to recuperate. My purple epidendrum orchid looks like it's not going to make it, and the beautiful Rhoeo that a nice FB member sent me died as well. Many of the leafy tropicals had lost most of their leaves, but are doing o.k. now that they're indoors.

My problem is lack of shade -- and lack of funds to create shade. With this heat, I can't put the sensitive shade plants outdoors, and they aren't getting enough air circulation in here due to the insane heat making it impossible to open windows for very long. The front picture window has plenty of light, but not enough to keep them from stretching.

It's so depressing watching my favorite plants bite the dust one by one, but maybe it's the Universe's way of telling me I need to put the past those plants belong to behind and start anew. Or maybe my plants just can't adapt to the climate here. Some have been struggling ever since I got here. They were so used to being outdoors all year around in SW Florida, except for a few cold snaps, and they don't like being indoors in the heat and a/c.

I'll eventually create some shade outside and put whatever survives out there, if anything makes it past this winter. In the meantime, all I can do is try to do the best I can and hope I don't lose too many more.

Garden Diary 04/12/2015: Update on WGOITG


I've been posting all my gardening goings on to the Florida Gardening Friends group on FB, but I've decided to start a garden diary right here. I'll put a link to them on the sidebar, in case anyone is interested in reading them all.

Community Garden Plot

First, as you may or may not know, I have a small community garden plot now. It's in the McCrorie Community Garden in the historic district of Gainesville. I really love it there. I didn't want to get a big plot, because I'm moving somewhere else in August, and I don't know where yet, so I figured I'd grow what I could here in the yard, and put the rest there for the time being.

It's turned out that there was a rather large four o'clock plant growing in the plot, which had put out quite a few seedlings. The garden manager didn't like having the plant there, so I dug it up, but didn't get quite deep enough, so I'm afraid it wasn't replantable. I have, however, been digging up the babies and replanting them here at the house. They'll probably all get mowed down eventually, but they'll be pretty this summer when people are coming by to see the house before I move.

I planted my okra seedlings there yesterday, and today I planted a few yellow squash and just a very few Contender bush beans. I'm not too crazy about beans, and generally just plant them to fix nitrogen in the soil.

Seedlings Galore!

I planted way too many seeds this year, being excited for the first year I actually had a place to play in the dirt. Due to the cold snap, my tomato seedlings didn't grow fast enough, so I had to toss a lot of them out. I'm still going to try to grow a few, but doubt they will do anything much before it gets too hot.

On an upnote, I just transplanted 18 Everglades seedlings into six-packs, which WILL do well this year. I planted grape tomatos yesterday, just by squeezing a few seeds out of one from the store. I'm not really crazy about grape tomatoes, but they are good in salads. I'm going to try to find a Husky Cherry Red. Now those are great cherry tomatoes! I might also try for a yellow pear, since they are good garden candy, but maybe not. I don't want to dig up too much of the yard, and I'm short on 5-gallon buckets.

I only got two cayenne seedlings out of all the seeds I planted. I thought about replanting, but two will be fine for this year. Only also go two seedlings from the Yolo Yellow Sweet Peppers that a friend gave me, but I have a lot of California Wonder bell peppers, and a fellow community garden member gave me a red bell pepper today, so I'm set on peppers, I think. I'll put those at the community garden since the soil is much better there, and I want as big a yield as I can get.

Garden Freebies!

Remember all those plants and seeds I "rescued" last year? I think the baby giant elephant ear died. I put it into the ground, and it hasn't come back up yet, so I'm not hopeful. I should have kept it in a pot for another year, but live and learn.

I planted all three of the elderberries in the yard, but depending on where I move to, I may dig one up and take it with me.

The seeds from the four o'clocks I rescued came up. Only two of the white ones survived, but more are coming up. I have no idea what color (I think fuschia), and don't know the color of the ones from the community garden either, but they're all pretty.

Unfortunately, the Amazon Lily seedlings did not survive and the coral bean seeds haven't sprouted yet, but they're still there. I hear it takes up to six months for them to sprout.

The passion flower plant is struggling, and I don't know what to do except leave it be and hope it starts to take off. The little redbud seedling I thought was dead is putting out new leaves, right next to the passion vine, so maybe it will be something for the passion vine to grow on one day. Unfortunately, I won't get to see it, since I'm leaving. If I move to a place with a yard, I may try to dig them up and take them with me.

No sign yet of the wood rose seeds I tossed along the back fence, but I haven't seen any others coming up where I got those, so maybe later.

I also was gifted some amaryllis and canna bulbs from the community garden. the cannas are red-leaved with red flowers. Don't know about the amaryllis. Someone trimmed the giant prickly pear the other day, so I'm going to grab a few pads from the compost pile tomorrow.

Also got some cuttings from spearmint and tropical safe that had escaped their boundaries and were growing in the common areas.

Raiding the Abandoned Lots 


I'm always looking for freebies when I walk around the neighborhood. There are so many abandoned lots around here with so many plants on them. They are just lots where houses were torn down, and most are never cared for, so I've been raiding them to get plants from the old homesteads.

So far, I've gotten cast iron plant, miniature wandering jew, green wandering jew and purple queen. I'm going to get cuttings from the azaleas and camellias in May, and maybe an elderberry -- again, depends on where I end up.

I got Musical Notes clerodendrum cuttings, rooted them and planted them in the yard, but they aren't looking too happy. I may have to get a seedling to replace it, but I'll give it time.

I found some loquat seedlings in the abandoned lot next door and put one in the yard and two in pots. There are gladiolus coming up there too, so I may go "rescue" some of those and keep them in pots. There is a crinum lily growing along the sidewalk on an abandoned lot, but I don't know if it would be cool to go dig that up. I'd like to, just because it keeps getting mowed down.

Well, that is enough for now. I'll post when progress when something new happens.


South Florida Month-by-Month: What to Plant in March


There are still seeds you can put in the ground in March. It's also time to plant summer vegetables, while still planting for another crop of your current winter-grown veggies. If you had frozen veggies this winter, you can replant those now and get a crop before the heat hits.

It's too late to start many cooler season vegetables, such as broccoli and greens, from seed, but you can buy starter plants and possibly get another harvest before hot weather hits.

Heat resistant annuals such as Zinnia, Marigold, and Cosmos are excellent choices to add color during warmer weather. Plant Coleus seeds now for everlasting summer color.

Annuals to plant in March in South Florida:


Ageratum Marigold Begonia Zinnia Coleus
Cosmos PortulacaSalvia Amaranthus Vinca
Aster Torenia Balsam Gloriosa Daisy


Vegetables to plant in South Florida in March:

Beans Cantaloupe Corn Cucumber
Mustard OnionPeppers Radish
Southern Peas Summer Squash Sweet PotatoesTomatoes
Watermelon

How to Plant in Sandy Soil


Sand is the predominant soil type in Florida. While sand on beaches or in zen gardens may be wonderful, pure sand is not conducive to growing most types of plants.

Florida sand has no nutrient value, and very little mineral value. It does not hold water well, and is a host to a very large nematode population. In short, unless you're planting nothing but natives, planting in Florida sand requires adding organic matter (compost, leaf mold, etc.) to get plants to thrive.

Adding Organic Matter is the Key when Planting in Sand

In my experience, when planting in sand, the best ratio of organic matter to sand is 3 to1, or 75% organic matter to 25% sand. Adding organic matter in this ratio converts pure sand into a sandy loam, which will hold enough moisture, while still providing proper drainage, giving proper nutrition, and keeping the nematodes under control.

When planting in sand, you will use one of two techniques. If you are planting a large area, you will want to mix the organic matter into the sand. Of course, if you are adding 75% more than what is there, this is going to raise the level of the soil unless you remove some of the sand beforehand. My favorite way of adding organic matter is to dig out to about 12 inches deep, and layer the organic matter three times with 3 inches of organic matter to 1 inch of sand. It will still be a little above ground level, but the sand will very quickly filter down into the organic matter, and it will level out. This saves a lot of work mixing the two in place. Digging down the required 12 inches is easy except for the sand collapsing in on itself, which I address below.

Planting a Single Plant in Sand

Planting a single plant in sand is easier. First you need to wet the sand so it will not collapse down upon itself while you're digging. Dig a small hole and fill with water and let sink in. Do this two or three times until the sides are saturated enough so that they don't collapse while digging. The water won't want to sink into the sand at first, so to decrease the surface tension, add some liquid dish soap to the water. The soap acts as a surfactant to make the water "stick" to the sand.

Once you have dug a hole that is two to three times the width of the plant rootball and 3 inches deeper, put 3 inches of organic matter into the bottom, add the plant, fill the hole with water, then layer as above, with 1 inch sand and 3 inches organic matter. To help roots establish, sprinkle 1 cup of epsom salts around the plant , from the trunk/stem to the drip line, water in, and mulch.

Maintaining the Organic Matter to Sand Ratio

Organic matter eventually breaks down, so adding organic matter each year will ensure that your plants continue to thrive. This can be done by simply spreading compost about 3 inches deep from right past the trunk to the dripline of the plant, working it into the top inch or two of soil, and mulching. After a few years, you will notice that the soil is very friable (crumbly) and rich; nothing like the sand you once had there.

Now your plant will be able to grow and thrive, and when it grows out past the amended soil, it will be strong enough to survive in the sand around it.

Image credit: Horton Grou via sxc.hu

How to Plant in Marl Soil


Planting in marl soil is challenging and time consuming, but it may be the only way to have a garden. Taking the steps to plant properly in marl will save a lot of trouble in the future.

What is marl?

Marl soil is one of the two most predominant soils in South Florida. Marl looks something like cement mixed with shell, and is almost as hard. While it may seem impossible that anything could grow in this soil, that isn't so. With the proper amendments, most plants can grow quite well in the marl of South Florida.

South Florida sits on a base of limestone. Marl is a base soil that is mostly limestone, mixed with sand. Limestone + sand = concrete. Marl sets up very hard, like concrete, but it is not impermeable to water, making it the soil of choice for building up low lying lots.

Contractors usually only put a shallow layer of 3-6" of topsoil down to get the sod to grow, therefore, houses built after 1989 probably have mostly marl soil underneath the topsoil.

How to plant in marl soil

To plant in marl soil, you will need:
  • A strong shovel
  • A water hose
  • Dishwashing liquid (not Dawn)
  • Composted Manure
  • Organic Matter
  • Epsom Salts

When dealing with planting in marl, water is a necessity

To plant vegetables in marl, it is necessary to dig either a hole 18 inches in diameter or a trench 18 inches wide. Both of these should be at least 12 inches deep.

To plant ornamentals in marl, it's necessary to dig a hole 3 times the diameter of the container, that's a 24" diameter hole for a 1 gallon pot, and a 30" diameter hole for a 3 gallon pot. The depth of the hole should be 3" more than the height of the rootball.

This will allow the roots to have room to spread. If this is not done, the plant will begin to decline and die within a year when the roots hit the marl, because young plant roots cannot penetrate and draw nutrients from marl.

Digging in marl is a process

First, squirt dishwashing liquid on the ground, and sprinkle it with water until it starts soaking in. The dishwashing liquid acts as a surfactant, breaking the surface tension of the soil. Then it will be possible to dig a small hole, fill it with water, and let the water sink in. It will now be possible to dig out to where the water soaked into the marl. Why is this so? Because water breaks the chemical bonds between the limestone and the sand in the marl.

This is sort of a "rinse and repeat" operation. Every time a larger hole is dug, fill it with water, let it sink in, and repeat the process until the proper size hole is completed. Time consuming? Yes, but if the yard has been built up with marl, this is the only choice, other than having someone with a backhoe dig it.

Filling the hole

The marl will now go back into the hole, along with at least 50% organic matter added. This is done by layering. First, put three inches of composted manure into the bottom of the hole to feed the plant during the first four weeks when it is getting established. NEVER put non-organic granular fertilizer into a hole when planting, as it will burn the roots.

Then place the plant and layer the marl and organic matter in 2-inch layers. After every two layers, fill the hole with water to keep it from developing air pockets, and to also make sure the organic matter gets completely saturated. Stop when it is filled within 1" of the top of the hole. When planting ornamentals, the top of the root ball should be level with the top of the hole.

When the hole is filled to within 1 inch of the top of the hole, sprinkle epsom salts around the top of the hole (1/4 cup for 1 gallon or smaller, 1 cup for 3 gallon or larger) and water in. This helps the roots establish themselves better. Mulch the plant to retain moisture, and the planting is done.
If planted properly in marl soil, your plants will thrive in their new environment for years to come.

How to Prepare Your Soil for Planting Tomatoes


According to the University of Missouri, tomatoes are the most popular plant for home gardens. In my personal experience, there is not another vegetable that can beat the look or taste of a perfect, vine-ripened tomato. To get these luscious tomatoes, you first must prepare the soil in the garden. I've found that a well-prepared tomato bed will produce more, larger and better tasting tomatoes, as well as preventing nematode damage to the roots. Be sure to place your garden in a site that gets at least six to seven hours of full sun each day, or you'll be eating green tomatoes all summer off of spindly, sickly vines.

That All-Important Organic Matter
 
Tomatoes love well-draining, humus-rich soil. Unfortunately, they are also prone to damage by root-knot nematodes, so the more organic matter in the soil, the fewer nematodes. I always spread a 6-inch deep layer of compost or composted manure on the top of the soil and turn it into the soil well to a depth of 12 inches with a shovel, rake or garden tiller every year. You really can't have too much organic matter for tomatoes.

The Essential Soil Test
 
Soil testing is one thing many gardeners overlook, and it can make the difference between boom and bust in your tomato bed. Test your soil after adding organic material, as this can change the pH and nutrient value of the soil. Most local agricultural extension services will provide a soil test kit and do the testing free or for a minimal charge. Soil test kits can also be purchased at local garden centers or online. Follow the instructions for the soil test to the letter to get accurate results. This test should be done four to six weeks before planting, to give plenty of time to receive the results.

Soil pH and Micronutrients
 
Once you receive the soil test results, apply the soil amendments as directed. Tomatoes like a neutral to slightly acidic pH, so there will probably be instructions for adding lime or sulfur. If your soil is nutrient deficient, the test will recommend supplementation for that as well. Mix the amendments recommended into the top 12 inches of the soil with a turning fork. Smooth and level the soil with a garden rake.

Give Your Tomato Plants Room to Grow
 
Different varieties of tomatoes take different amounts of room. If you grew the tomatoes from seed, the package may have spacing requirements. If not, a general rule-of-thumb is 12 inches apart for dwarfs, 15 to 24 inches apart for staked plants, and 24 to 36 inches apart for trellised or ground bed plants. Vigorous growing indeterminates should be given 4 feet between plants and 5 to 6 feet between rows. In my experience, if you have extra room, spread them as far apart as possible and you'll get much more fruit.

Now you're all ready to put those tomatoes in the ground, knowing that they will be given the most beneficial soil conditions available. In a couple of months, you will be reaping the fruits of your labor and thanking yourself for taking the time to prepare the bed properly beforehand.

Sources:
Personal Knowledge and Experience
University of Missouri Extension: Growing Home Garden Tomatoes

South Florida Gardening Month-by-Month: What To Do In February

Papayas killed by a freeze can be replanted from seed and will bear within a year.
February is a very busy month in South Florida gardens. Temperatures are warming in most of the area, and insects are coming back into activity.

Insect control in South Florida

Check plants for scale and mealybug activity. Hornworms will be appearing on tomatoes, as will various fungal and wilt diseases. Make sure to keep foliage dry, watering in the morning, as wet conditions aggravate these diseases.

Spider mites are still around, as they thrive in dry weather, so make sure to keep a watchful eye. Removing them is done with a strong stream of water directed
under the leaves. Systemic chemical sprays are available to treat spider mites, but the water spray does just as good a job, and you can't use systemic chemicals on edibles.

Cleanup and Pruning

In warmer areas, where no further freezing temperatures are expected, pruning can begin toward the middle/end of the month. In colder inland areas, it's best to wait out February and begin pruning and cleaning plants in March. Early pruning will cause plants to put out new growth, which can be damaged by subsequent cold spells.

Cleaning up dead foliage and grass is essential before the insects and diseases that harbor in them have time to spread to your plants. Removal and replacement of mulch is best done now as well.

Planting and Fertilizing

February is the last best month for planting shrubs and edibles, such as blueberries. Bare root roses can also be planted this month, making sure to keep them watered well during this dry season.

While it's tempting to fertilize your plants when the first growth appears, it really should be postponed until March, when soil temperatures rise and there is absolutely no chance of frost killing off the new growth. Fertilizers will not be taken up into a plant until soil temperatures reach 70 degrees, so applying them now is simply a waste.

Starting Seeds

February is a great time to start seeds for your late spring and summer crops. Many vegetables can still be planted this month, and summer vegetable seeds such as eggplant and peppers can be given a jump start for planting later on.

Annuals such as marigold, zinnia, and cosmos can be started now. These are very heat resistant plants that will grow and bloom right through the summer.

The mild temperatures across most of South Florida make gardening very pleasant in February. Chores that are torturous in the summer are best done now before the heat hits and keeps us all inside for most of the day.

Photo Credit: Atamari [CC-BY-SA-3.0 (www.creativecommons.org/licenses/by-sa/3.0)], via Wikimedia Commons

South Florida Gardening Month by Month: What to Plant In February

Photo credit: Michael Wolf CCSA 3.0 / Wikimedia
February gardening in South Florida is generally a time of preparation, cleaning and replanting. Temperatures are warming, and there is generally no chance of a hard freeze. Now is the time to plant that vegetable garden you didn't get around to in September, or second vegetable crop can now be planted in order to get in a harvest before the summer heat hits. February is also a perfect time to refurbish those freeze damaged beds, or start a new one.

There is still time in February to plant most of what you didn't get planted in January. What most of our northern transplants consider summer vegetables still have time to bear before hot weather. February is a great month in the South Florida garden, and with the wonderful cool weather, one of the most productive months of the year.

Annuals to plant in February in South Florida:


Ageratum Hollyhock BegoniaPetunia Candytuft
AlyssumDianthus Celosia SalviaVinca
Marigold Nasturtiums Cosmos Portulaca Impatiens


Vegetables to plant in South Florida in February:


RadishTomatoOnionsBeetsCabbageEggplant
BroccoliPeasPotatoTurnipsLettucePepper
CeleryMustardCauliflowerChinese
Cabbage
BeansCucumber
SquashSpinachCornCollardsParseyKohlrabi


Bulbs to be planted in February in South Florida:


TuberoseDahliaEucharisCanna
CaladiumBlood LilyLiliesDaylily
AgapanthusZephranthesCallaCrinum
AlliumGingerMontbretiaWatsonia

Florida Gardening 101: What Are the Different Kinds of Hibiscus?


The first plant most northerners moving to Florida want in their yard is a hibiscus. They usually have the single red tropical hibiscus in mind, because they've seen them in pictures and movies. The truth is, hibiscus is a very large family of plants, and includes not only tropical, but several other varieties suitable for growing in Florida.

Tropical Hibiscus

Pictured above, tropical hibiscus is native to Hawaii, not Florida. They are easily identified by their shiny leaves. It's unknown exactly when the first tropical hibiscus plant was brought to Florida, but since then, an entire industry has sprung up around these spectacular plants. Hybridizers are constantly coming up with new varieties, with larger, showier flowers. Unfortunately, most of these fancy tropical hibiscus hybrids are more demanding to grow, and not as cold hardy as the older varieties. The easiest tropical hibiscus to grow are actually the original, single red and single pink flowered varieties. They bloom more prolifically, and have fewer problems.

Tropical hibiscus do best in zones 9b and above, but mature plants can survive the freezes in 9a and come back from the base if you mulch the bottom 3 inches well during the freeze.

Hibiscus Syriacus
Perennial Hibiscus

Perennial hibiscus is a name given to a large group of hibiscus that go dormant in the winter, and come back in the spring. Some of the perennial hibiscus , such as H. mutabilis (Confederate Rose) die completely down to the ground, while others, such as Hibiscus syriacus (Althaea), are woody perennial shrubs that simply go dormant and leaf out in the spring.

Hibiscus moscheutos
Hardy Hibiscus

Hardy hibiscus (Hibiscus moscheutos) are actually members of the mallow family. These are the "Dinner Plate" and "Frisbee" hibiscus with large, showy flowers, and are hardy in much colder climates, so are a favorite of some northern gardeners. Hardy hibiscus usually do not come in colors other than white, pink
or red. Hardy hibiscus die back to the ground in winter, and return in the spring, growing larger every year. They many times do not survive our hot, wet summers for over 2-3 years before succumbing, but are much longer lived in cooler, drier climates. Fortunately, hardy hibiscus can easily be grown from seed and bloom the first year.

Okra
Edible Hibiscus

Edible hibiscus are usually ornamental as well as useful. As a matter of fact, okra is a member of the edible hibiscus family. Hibiscus sabdariffa, known as Florida cranberry, or sorrel in the Caribbean islands, has red calyxes that are used in salads, cooking, and to make a very tasty ginger wine. Hibiscus acetosella (Cranberry Hibiscus) has edible leaves, flowers, and flower buds. Albemoschus manihot (formerly Hibiscus manihot), a close relative of okra, is listed in the "Plants for a Future" database, as both its leaves and flower buds are edible.

Most garden centers in Florida, especially in the big box stores, only carry tropical hibiscus, and sometimes the hardy hibiscus in the summer. You will usually have to order plants or seed for the others.

In online forums, when you ask "Why is my hibiscus dying?", don't be surprised to get a reply of "What kind of hibiscus?" Knowing the different types can get you a more accurate and useful answer.

More about hibiscus:

Why Are the Leaves on my Hibiscus Turning Yellow?

I Am Really Impressed with Dollar Seed


DISCLAIMER: I am not being paid for, nor was this post solicited by Dollar Seed. It is my honest opinion, nothing more, nothing less.

I found Dollar Seed awhile ago, looking for beefsteak tomato seeds, but had forgotten about them until this year when I wanted some cheap seeds for my new place. If you like no-frills, old timey heirloom varieties, this is an excellent place to get a bargain. Their seeds are all non-gmo, organic and heirloom. I got a notice the other day that they were having a sale, and I swear, I wish I'd had more money, because I surely would have bought more. As it was, I ordered 12 bags of seeds at the sale price of $.75 each. Shipping was about $3.25, I think. It was less than the $12 I had in PayPal -- yes, you can pay with PayPal, which makes it so convenient for me.

The seeds came in a padded envelope, nicely labeled in zipper plastic bags (they sell these, too), and I was amazed at the number of seeds in each packet. The packet even has a germination rate on it. There is nothing fancy, no planting instructions, but I guess if you're ordering these seeds, you know how to plant them.

I got these varieties, which are some of my favorites:

Cosmos "Sensation Mix" - 200 seeds
Gaillardia aristata - 145 seeds
Common Thyme - 220 seeds
Chives - 125 seeds
Okra "Clemson Spineless" - 60 seeds
Nasturtium "Jewel Mix" - 25 seeds (large seeds)
Tomato - Beefsteak 91 Seeds
Tomato - Roma 91 seeds
Pepper - California Wonder 55 seeds
New Zealand Spinach - 17 seeds (uncommon plant, so this is a great amount for the price)
Yellow Straightneck Squash - 39 seeds
Boston Pickling Cucumber - 32 seeds

As you can see, there is nothing fancy here, just common varieties, but they are some of the most popular and best growing varieties as well. They do have some interesting varieties I'd like to try like Chiogga  and Detroit Gold beets and "Great White" tomato. With what you save buying the common varieties from Dollar Seed, you can buy a few of those fancy-schmancy hard-to-find seeds from some other place.

I got so many seeds that I am sharing with a friend who has a tiny garden spot and only needs a few seeds of each, and since I have a small garden spot too, I will have some left over for next year.

There are about 100 varieties of vegetable seeds and quite a few flower and herb seeds as well. Some of them come in bulk and they also have a few varieties of sprouting seeds. They also have garden seed kits and a big box of one of every variety they sell in the store for a great discount.

But if you read their About Us page, you will see the best reason to buy from them. Part of their profits go to feed the poor, and they donate seeds to schools and outreach programs. It's a great way to help people and help yourself to some great seeds at big savings.

Check them out. I don't think you'll regret it. I certainly don't.